Friday, March 25, 2011

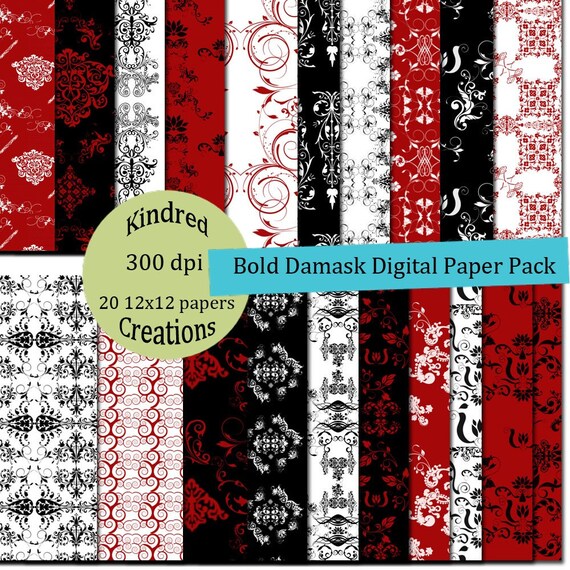
Bold Damask

Kindred Creations has had a Deal of the Day blog for almost 2 years now.  Recently however Kindred Creations has started adding a weekly Digital Deal of the Week to satisfy all those digital and hybrid crafters as well as those who like to print their own papers.

This week the Digital Deal of the Week is this Bold Damask paper kit.  Aren't they just awesome!  The best part is that you can pick up this paper pack for only $1!  You can always pick up some of the past Deals of the Week in the Kindred Creation Store at prices that are still very reasonable.


 Last night I quickly whipped up a card for the reveal of this weeks kit.  I thought these papers would be awsome to print out and use to create a card.  I printed out portions of two of the papers onto white cardstock.  (Even the B&W papers would be awesome to print onto coloured card stock for a change!)  I created an 8 1/2" x 3 2/3" card base and inked the edges with black ink.  I then took an 8"x3 1/3" piece of the black and white paper which I also inked and adhered it over the base.  I then took a 3x3 2/3" piece of red patterned paper and added a strip of white card stock edged with the Martha Stewart eyelet lace border punch.  I then tied a bow from black satin ribbon using the bow easy and wrapped the card stock layers with the black ribbon and topped with the bow.  I adhered this over the base.  A quick and simple card that's perfect for many occasions, with this elegant paper pack.

Wednesday, March 23, 2011

Magnolia cup sleeve.


I used a cup sleeve template and created a file where I layered various magnolia blossoms to create a bouquet. I added a shadow between the layers to give it some dimension, I then added a digital paper behind the flowers and printed it out. I cut it to the shape of the cup sleeve template and then covered it with a clear mac tac that I cut slightly larger than the card stock. I folded over the sides to the back. I cut the top and bottom every half inch and folded it towards the back as well. I then adhered it onto the fun foam that was cut to the shape of the larger template. I did cut a portion of the fun foam off the end so it wouldn't overlap like the card stock layer. I then stitched all around the card stock through the foam as well as stitching the overlapping paper together. Then just to add a wee little bit of dimension to the project I stitched on a small fabric butterfly between the magnolia blossoms.  I slipped the whole thing onto my ceramic travel mug and now it is sooo pretty... no more bland boring old travel mug for me.   The layer of clear mac tac allows it to handle a little bit of moisture, of course I still wouldn't suggest more than a damp rag to wipe the sleeve, but it easily slips of to wash the mug.

Thursday, March 10, 2011

Elephant Tail

I created this card for another round of card tag.  I was asked to lift this card by Susan.  I started with a brown card base and layered it with patterned paper from an Amy Butler Belle Mat Pad.  I then printed and coloured the elephant tail digital stamp with Lyra artist pencils.  I then took Adirondack Denim Acrylics to create the water droplets from his spout.  I matted this image with green and pink card stock and  centered it onto the base.  I then cut a splash from blue card stock and adhered it above and below the image.  Lastly I added three KaiserCraft pearls to the image.

Monday, March 7, 2011

Flowers in the window

  I used the window digital stamp and Flower and Vase digital stamp. I took the flower and duplicated it twice to create a bunch of flowers and placed it on the window sill.  I then printed it and coloured it with Lyra artist pencils and cut it out.  I took a dark brown card base and layered a piece of Basic Grey Olivia Sydney patterned Paper over it.  I also took a strip of Basic Grey Olivia Emma patterned Paper.  I edged it with a strip of white card stock on which I used a Fiskars Sunburst border punch and stitched the edges with white thread.  I wrapped it with a piece of sheer white ribbon, and added a bow tied with the bow easy near the top.  I adhered this strip slightly to the left of center of the card base.  I then used foam adhesive to mount the window under the bow.  To finish it off I added three Kaiser Craft pearls to the patterned paper strip under the window.

Friday, March 4, 2011

Lenten Rose

I opened a document and inserted the Lenten rose digital file, rotated and placed it in the top right hand corner.  I duplicated the layer and placed it in the bottom left hand corner, and then scaled it to 80%.  I printed it out on white card stock and coloured the stamps in with my Lyra artist pencils.  I then masked around the flower petals and used Adirondack ink and a paint brush to dab colour onto the petals, as well as along the seed pods.  I cut an oval from the center using a Coluzzle template.  I also printed the Martin Luther quote onto white card stock and cut it out two sizes smaller.  Using the Martha Stewart eyelet lace punches I cut a mat for the image, which I then matted on white before adhering to a card base I inked with green Adirondack ink .  I also cut another mat for the quote and inked it green as well.  I mounted the image on the card using foam adhesive and adhered the matted quote inside the cut out oval without foam tape.


Thursday, March 3, 2011

Happy Birthday!

We had the opportunity to celebrate the birthday, of a big horse lover, and all round great person.  In honour of her birthday I created this card for her.
I created a square card base from white card stock and inked it using pink sherbet Adirondack ink.  I then ran brown card stock through the Cuttlebug using the mesh embossing folder.  I then embossed it with UTEE, and stitched around the edges and added it to the base.  I cut three layers of a shaped mat and adhered them together over the centre of the card base.  I then cut a horseshoe shape and added some metallic chalk and then embossed with UTEE.  I adhered it to the card using foam adhesive.  I punched some leaves from green card stock using the Martha Stewart branch punch, and used them with ribbon roses and pearl stamens created a floral arrangement on the horseshoe.  I tied a bow using the bow easy from some pink suede cord and added it under the floral arrangement.  I stamped a sentiment in brown ink on a strip of green card strips and tucked it between the horseshoe.  Lastly I added Kaiser Craft white pearls to the horseshoe and clear Kaiser Craft clear jewels to the ends of the sentiment strip.
I was really glad to hear she liked the card and it was a perfect companion to the horseshoe picture frame we gave her.

Tuesday, March 1, 2011

Card Maps

I always really enjoy the Page Maps and Card Maps by Becky Fleck.
The best part was that this month Becky gave me the opportunity to create a card for one of the card sketches that were released today.
Becky sent me a wonderful sketch.. go check out this months card maps and this card sketch in particular.  This is the card I created using that sketch.
I started with a white card base which I inked with pink Adirondack ink.  I layered white card stock inked with lettuce Adirondack ink on top of that, then another layer of white card stock I embossed with the Textile Texture Cuttlebug embossing folder.  I then stitched the layers together using pink thread.  I inked the white lace with green ink and ruffled it and ran it the width if the card down the centre.  I layered a piece pink inked card stock over it and a layer of white ribbon.  I cut 3 layers of shaped mats, inked in pink and lettuce ink, layered them and adhered it to the centre of the card.  I cut numerous leaves using the Martha Stewart branch and rose leaf punches.  Inked the branch punches using the lettuce ink and the rose leaves using willow ink.  I also took pink ribbon roses in two sizes and spiraled the wire stems and pearl stamen stems, and used them with the leaves to create a floral arrangement.  I stamped the Inque Boutique sentiment on a strip of white card stock using the lettuce ink.  I notched the ends and inked the edges using pink ink.  Then I folded the ends and adhered it using foam adhesive in the centre between the flower arrangement.  I added large pink Kaiser Craft pearls to the corners and smaller ones to the ends of the sentiment strip.